Use more of SpeechExec
Settings menu
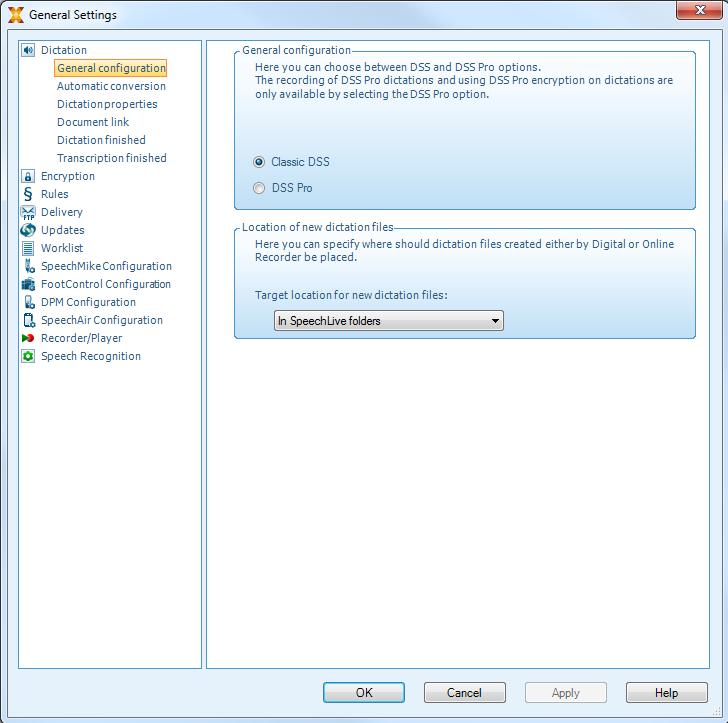
The General Settings window allows personalization of a variety of application settings, such as dictation options, encryption, user profiles, delivery rules, software updates and work list options. It also allows the configuration of a PocketMemo, SpeechMike, SpeechAir, SpeechOne, a foot control and recorder/ player settings.
Click Settings > General settings on the menu bar to open the Settings menu. The left pane contains the list of the available settings.
Select an option in the list to display the associated options on the right pane.
Click Apply to save the changes or click OK to save the settings and close the window.
 |
Note
All or some of the settings can be preconfigured and locked by your system administrator. Locked settings are read-only.
PocketMemo Configuration Wizard
The PocketMemo Configuration Wizard guides you through the device configurations and settings of a PocketMemo.
Make sure that the PocketMemo is turned on and connect the device to the computer using a USB cable.
Start Philips SpeechExec software.
Click Settings > General settings on the menu bar and select DPM Configuration > DPM Wizard from the list on the left side.
Click the Start Wizard... button to open the wizard. Follow the onscreen instructions to customize the PocketMemo.
Click the Finish button to close the wizard and confirm the transfer of the new settings to the PocketMemo.
Configure the download process from PocketMemo
How and which files are downloaded after a PocketMemo is connected, can be configured in the Settings menu.
Make sure that the PocketMemo is turned on and connect the device to the computer using a USB cable.
Click Settings > General settings on the menu bar and select DPM Configuration > DPM settings from the list on the left side.
Click the Start configuration… button.
X The Recorder configuration window opens.
Select Downloading in the left pane.
Select which files should be downloaded from the PocketMemo. The download settings also allow the user to specify if files will be deleted on the PocketMemo after they are downloaded.
Click OK to save the settings and close the window.
SpeechMike Configuration Wizard
The SpeechMike Configuration Wizard guides users through the device configurations and settings of a SpeechMike.
Connect the SpeechMike to the computer.
Start Philips SpeechExec software.
Click Settings > General settings on the menu bar and select SpeechMike Configuration > Configuration Wizard from the list on the left side.
Click the Start Wizard... button to open the wizard. Follow the onscreen instructions to customize the SpeechMike.
Click the Finish button to close the wizard and confirm the transfer of the new settings to the SpeechMike.
SpeechAir Configuration Wizard
The SpeechAir Configuration Wizard guides you through the device configurations and settings of a SpeechAir.
Make sure that the SpeechAir is turned on and connect the device to your computer using the USB cable.
Click Settings > General settings on the menu bar and select SpeechAir configuration > Device configuration from the list on the left side.
Click the Open SpeechAir wizard... button to open the wizard. Follow the on-screen instructions to customize the SpeechAir.
Click the Finish button to close the wizard and confirm the transfer of the new settings to the SpeechAir.
Configure the download process from SpeechAir
How and which files are downloaded after a SpeechAir is connected, can be configured in the Settings menu.
Make sure that the SpeechAir is turned on and connect the device to your computer using the USB cable.
Click Settings > General settings on the menu bar and select SpeechAir configuration > Download from the list on the left side.
In the Download file type section, select which files you want to be downloaded from the SpeechAir. The download settings also allow the user to specify if files will be deleted on SpeechAir after they are downloaded.
Click OK to save the settings and close the window.
SpeechOne Configuration Wizard
The SpeechOne Configuration Wizard guides you through the device configurations and settings of a SpeechOne.
Make sure that the SpeechOne is turned on and connect the device to your computer using the USB cable.
Click Settings > General settings on the menu bar and select SpeechOne configuration > Device configuration from the list on the left side.
Click the Start Wizard... button to open the wizard. Follow the onscreen instructions to customize the SpeechOne.
Click the Finish button to close the wizard and confirm the transfer of the new settings to the SpeechOne.
Speech recognition functions
SpeechExec handles the complete dictation and transcription workflow including the interface to Dragon NaturallySpeaking speech recognition. This way, you can control the entire process from dictation, speech recognition and correction to the final text document in SpeechExec.
Note
To activate the speech recognition functions, an additional SpeechExec license is required. For more information about upgrading, contact your local Philips dealer.
If you have already purchased a speech recognition license for SpeechExec, click Help > License information on the menu bar to activate the license.
Setting up speech recognition
SpeechExec installs only the necessary files and components to access the recognition application functionalities. The Dragon NaturallySpeaking speech recognition application must be purchased and installed separately. For information on the installation, configuration, training, and adaptation of Dragon NaturallySpeaking, see the Dragon NaturallySpeaking user manual.
Note
For full performance of Dragon speech recognition, make sure that not too many programs are running in the background simultaneously. This might slow down the computer and negatively affect Dragon speech recognition performance.
To use Dragon NaturallySpeaking for speech recognition, a Dragon user profile with a valid user name and dictation source is required. For more information, see Creating a Dragon user profile.
User profiles can either be saved on the local hard drive (C:) or on a server where they can be accessed through a network connection (roaming profiles).
Before using the speech recognition feature, make the following settings:
Note
If you install Dragon speech recognition software separately, we recommend that you manage all Dragon-related settings (e.g. User profiles or Vocabulary) via the Dragon bar and not via SpeechExec or the SpeechExec speech recognition recorder.
Enable the speech recognition functions in the SpeechExec Settings menu under Settings > General settings > Speech recognition > Dragon profiles > Speech recognition settings.
Select your Dragon user profile.
To enhance your user profile, train vocabulary from typical documents in General settings > Speech Recognition > Vocabulary > Learn from specific documents.
Optional settings
Enable the use of roaming user profiles under Settings > General settings > Speech recognition > Dragon profiles.
Enable the use of templates under Settings > General settings > Speech recognition > Templates if you want the text to be inserted into a predefined text document.
Enable the automatic start of the recognition queue under Settings > General settings > Speech recognition > Offline recognition to process dictation files newly added to the recognition queue automatically.
Enable the automatic collection of corrected dictation files for adaptation under Settings > General settings > Speech recognition > Adaptation to make adaptations on Dragon user profiles based on the corrected speech-recognized documents.
Enable the automatic start of the speech recognition queue whenever dictation files are downloaded from the PocketMemo or SpeechAir recorder. Activate this option under Settings > General settings > Offline recognition. Then, in the DPM or the SpeechAir Wizard go to the USB Download section and activate Dragon speech recognition.
Note
If this option is activated, the conversion, encryption and other delivery after download options are disabled.
When using this option, make sure that the delivery option SR (speech recognition) is also activated on the PocketMemo and in the Voice Recorder App on SpeechAir.
Creating a Dragon user profile
Create a new user profile
Go to Settings > General settings > Speech recognition > Dragon profiles.
In the section Speech recognition settings, click Create new Dragon profile....
X The New User Profile window opens.
Click New... and then follow the onscreen instructions.
Note
When creating a new Dragon profile and using a Philips SpeechMike microphone, select Microphone: SpeechMike III as your audio device in the Dragon profile setup window.
When creating a new Dragon profile and using a Philips PocketMemo recorder, select Transcription source as your audio device in the Dragon profile setup window.
When creating a new Dragon profile and using a Philips SpeechOne Dictation headset, select Headset Microphone: SpeechMike III as your audio device in the Dragon profile setup window.
We highly recommend using a USB microphone dictation source. Only this source can be used for recording dictation files within SpeechExec.
Use the same author name for your Dragon user profile as you are using for your SpeechExec profile. To select a Dragon profile, go to Settings > General settings > Dragon profiles > User name and select the relevant user profile from the drop-down list.
Using speech recognition
SpeechExec supports two types of speech recognition. Your words are transcribed onto your screen as you dictate (online speech recognition) or files that where previously recorded (e.g. on a PocketMemo or a SpeechAir) are transcribed when they are downloaded to your computer (offline speech recognition).
Online speech recognition
Dictate directly into the speech recognition software and have your spoken text transcribed by Dragon straight away.
Connect your dictation device to your computer.
Create a dictation with speech recognition in SpeechExec by selecting
 New with speech recognition from the toolbar or the File menu.
X The SpeechExec Speech Recognition Recorder window opens.
Start recording. For more information about recording, see Create a recording.
Note
As you talk, your words are transcribed onto your screen. Corrections to the transcribed text can be made during recording or when recording is complete.
To mark the previous or the next word for editing or correcting, press the V or W button on the SpeechMike briefly. Press the • EOL/• • PRIO button repeatedly to mark one or more words previous to the cursor. To display the correction or spell dialog of Dragon NaturallySpeaking, select the word recognized incorrectly and press the INS/OVR button on the SpeechMike. If no text is selected, the word or phrase previous to the cursor is taken into account.
Tip
Define the dialog to be displayed when the INS/OVR button is pressed under Settings > General settings > Worklist > Shortcuts > Online recorder.
When the recording is complete, select one of the following options from the toolbar or the File menu:
Finish: The dictation file is moved to the Archive folder and the status is set to Transcription finished. A Text document (.rtf) containing the transcribed text is attached to the dictation file.
Note
The Archive folder is hidden by default. To display the Archive folder in the folder tree, click Settings > General settings on the menu bar and select Work list > Folders from the list on the left side. Select Archive and change the Visible option to Yes.
Send for correction: The dictation file is moved to the Finished dictations folder and the status is set to Correction pending. A text document (.rtf) containing the transcribed text is attached to the dictation file.
Save as draft: Mark a recording as suspended to temporarily interrupt recording and finish it later. The recording is saved in the Suspended folder.
Offline speech recognition
Record a dictation on your dictation recorder and have your dictation files transcribed by Dragon after downloading them from your dictation recorder to SpeechExec.
Download a previously recorded file from your PocketMemo or SpeechAir (see Download recordings from a dictation recorder) or create a new dictation file in SpeechExec by selecting
 New from the toolbar or the File menu (see Create a recording).
Select one or more dictation files from the work list.
Click the
 Add to Dragon speech recognition queue button on the toolbar to queue the selected files for speech recognition in the Recognition and adaptation queue panel.
Click the
 Start recognition queue button in the Recognition and adaptation queue panel to start the speech recognition process.
X When the speech recognition process is finished, the dictation file is moved to the Finished dictations folder and the status is set to Correction pending. A text document (.rtf) containing the transcribed text is attached to the dictation.
Note
The name of the user profile in Dragon NaturallySpeaking must be identical to the SpeechExec author name and the author name used for recordings on a handheld dictation recorder. The speech recognition software cannot recognize dictations if the Dragon profile name and the author name differ. In this case, contact your administrator.
Speech recognition is not supported for the following dictation files:
.wav files with a sampling rate of less than 11kHz.
Encrypted dictations
Playback and correction of transcribed recordings
Double-click a speech-recognizable dictation file in the work list.
X The dictation file is opened in the SpeechExec Speech Recognition Recorder.
Use the buttons on the toolbar of the speech recognition recorder, the SpeechMike or the PocketMemo to rewind, forward and start playback. For more information, see Play back a dictation file.
X By default, the transcribed text is simultaneously highlighted during playback, forwarding and rewinding.
X You can change this setting in Settings > General settings > Speech recognition > Correction settings.
Note
If too much editing or correction is made on the transcribed text or the entire flow of the document is changed, highlighting may not work properly.
If parts of the transcribed text are deleted, the related sound parts will remain in the sound file.
Dictation files with the status Transcription finished can be opened only for playback. Editing or correction is not possible.
Send dictation files via email
SpeechExec allows dictation files to be transferred via email directly to the transcriptionist or any other recipient.
Note
If you are not connected to the Internet, the QuickSend option (if activated) is not available. All dictation files will then be saved in the Outbox folder. You can send these files later as soon as you are connected to the Internet.
Set up an email profile
To transfer dictation files directly by SpeechExec without using the computer’s default email application, you need to set up an email profile.
Note
When no email profile has been set up, emails are sent via the default email application of the computer (e.g. Microsoft Outlook).
To set up an email profile:
Click Settings > General settings on the menu bar to open the Settings menu, and select Delivery > Email from the list on the left side.
Deselect the option Use your default emailing program to send dictations (QuickSend).
Click the Add... button to add a new profile. Select a type of profile, enter a profile name and click OK.
X The settings window for the selected profile is displayed.
Enter the settings for the selected profile and click OK to save the settings.
Manually send dictation files via email
You can send dictation files manually with the Quick Send option and your default email program. Alternatively, you can save your dictations to the Outbox folder and send all files bundled at a later time.
Note
If you want to use the QuickSend option, make sure it is activated in Settings > General settings > Delivery > Email.
To transfer dictation files manually:
Select one or more dictation files from the work list.
Click the
 Submit for email button.
X If you have activated the QuickSend option, an email window with the attached dictation file(s) opens either with the computer’s default email application or via the configured email profile.
X If you have deactivated the QuickSend option, the dictation file(s) are saved in the Outbox folder and a draft email window opens for each dictation file separately.
Enter recipients, body text and additional attachments.
If you have activated the QuickSend option, click Send to send the message.
If you have deactivated the QuickSend option, click OK to close the draft email window and send the dictation files bundled at a later time.
To send the dictation files bundled at a later time, click the
 Send and Receive button on the toolbar.
X All dictation files in the Outbox folder are transferred. See Automatically send dictation files for more information about sending dictation files in the Outbox folder automatically.
Note
The Outbox folder is hidden by default. To display the Outbox folder in the Folder tree, click Settings > General settings on the menu bar and select Work list > Folders from the list on the left side. Select Outbox and change the Visible option to Yes.
No more than five dictation files can be attached to an email at a time. If more than five dictation files are selected, SpeechExec creates a new email for each group of five files that should be sent by the user manually.
Set up automatic email sending
You can have dictation files automatically prepared for email sending when a recording is finished or when files are downloaded from a PocketMemo or a SpeechAir.
For SpeechExec recorder:
Click Settings > General settings on the menu bar to open the Settings menu.
To set up automatic sending when a dictation file is finished in the SpeechExec recorder, select Dictation > Dictation finished from the list on the left side. Activate the Email option.
Click the OK button to save the settings.
X Dictation files will now be automatically copied to the Outbox folder when they are finished.
Click the
Send and Receive button on the toolbar to transfer all dictation files saved in the Outbox folder. See Automatically send dictation files for more information about sending dictation files in the Outbox folder automatically.
For PocketMemo:
Click Settings > General settings on the menu bar to open the Settings menu.
To set up automatic sending after a dictation file is downloaded from a PocketMemo, select DPM Configuration > Delivery after download. Activate the Email option. Optionally, click the Configure button to set up default contents for emails (recipients, subject, body text, attachments).
X Dictation files will now be automatically copied to the Outbox folder when they downloaded from a PocketMemo.
Click the
Send and Receive button on the toolbar to transfer all dictation files saved in the Outbox folder. See Automatically send dictation files for more information about sending dictation files in the Outbox folder automatically.
For SpeechAir:
Connect your SpeechAir to the computer.
Click Settings > General settings on the menu bar to open the Settings menu.
To set up automatic sending after a dictation file is downloaded from a SpeechAir, select SpeechAir configuration > Device configuration > Open SpeechAir wizard.
In the USB download section of the SpeechAir Wizard, activate Email delivery.
Click Finish to save the settings.
X Dictation files are now copied automatically to the Outbox folder when they are downloaded from a SpeechAir.
Click the
Send and Receive button on the toolbar to transfer all dictation files saved in the Outbox folder. See Automatically send dictation files for more information about sending dictation files in the Outbox folder automatically.
Note
The Outbox folder is hidden by default. To display the Outbox folder in the Folder tree, click Settings > General settings on the menu bar and select Work list > Folders from the list on the left side. Select Outbox and change the Visible option to Yes.
Automatically send dictation files
By default, dictation files in the Outbox folder are transferred only after clicking the Send and Receive button on the toolbar. However, you can change this setting and send dictation files automatically.
To send dictations automatically:
Click Settings > General settings on the menu bar to open the Settings menu, and select Delivery > Send/receive from the list on the left side.
Activate the option Send and receive automatically and set a time interval for dictations to be sent automatically.
Click the OK button to save the settings.
X Dictation files in the Outbox folder will now be automatically sent via email.
Send dictation files via Philips Voice Recorder App
If you are using a smartphone, you can download the Philips Voice Recorder App and send your dictations to SpeechExec, to the Philips SpeechLive speech recognition service, and to the Philips SpeechLive transcription service directly via the app.
Log in to SpeechExec in your Philips Voice Recorder App
Download the Philips Voice Recorder App from the Google Play Store or from the Apple App Store.
To activate SpeechExec in the app, start the app and go to Settings > Sending options > SpeechExec Enterprise. Then tap the switch next to Use SpeechExec Enterprise.
X The SpeechExec Enterprise login window opens.
Enter the username, password and URL provided by your administrator, and then tap Sign in.
X You are signed in and can now send your dictations to SpeechExec, to the speech recognition service, and to the transcription service from within your Philips Voice Recorder App.
Note
You can only use the speech recognition service and the transcription service if your account administrator has activated these services.
Send dictations to SpeechExec
Make sure that you are connected to a Wi-Fi network.
Record a new dictation with your Philips Voice Recorder App or open an existing dictation from the Recordings tab.
Tap
 on the recording screen.
X The Sending options pop-up window appears.
Tap SpeechExec.
X The dictation is marked as sent
 in the recordings list.
X You can now also access your dictations in your SpeechExec dictation software.
Send dictations to SpeechLive speech recognition service
Make sure that you are connected to a Wi-Fi network.
Record a new dictation with your Philips Voice Recorder App or open an existing dictation from the Recordings tab.
Tap
on the recording screen.X The Sending options pop-up window appears.
Tap Speech recognition service.
X The Select the language of your dictation pop-up window appears.
Select the language of your dictation by scrolling to the desired language. Optionally, mark the Remember setting checkbox if you don’t want the pop-up window to appear again. The dictation app saves this setting.
Tap Send.
X The dictation is marked as sent
in the recordings list.
Send dictations to SpeechLive transcription service
Send a single-speaker dictation to transcription service
Make sure that you are connected to a Wi-Fi network.
Enable Single-speaker in Settings > Sending options > SpeechLive > Use transcription service.
Record a new dictation with your Philips Voice Recorder App or open an existing dictation from the Recordings tab.
Tap
on the recording screen.X The Sending options pop-up window appears.
Tap Transcription service.
X The dictation is marked as sent
in the recordings list.
Send a multi-speaker dictation to transcription service
Note
The multi-speaker option is only available in the Philips Voice Recorder App if this feature is enabled by your administrator.
Make sure that you are connected to a Wi-Fi network.
Enable Multi-speaker in Settings > Sending options > SpeechLive > Use transcription service.
Record a new dictation with your Philips Voice Recorder App or open an existing dictation from the Recordings tab.
Tap
on the recording screen.X The Sending options pop-up window appears.
Tap Transcription service.
X The dictation is marked as sent
in the recordings list.
Enterprise App Interface (API)
SpeechExec Enterprise 8.0 added an API (Application Programming Interface), enabling external applications to connect to SpeechExec Enterprise. This new API support offers new ways to connect various systems to SpeechExec Enterprise:
Hospital Management Systems (HIS) / Health information Systems
The user schedules a dictation in his Hospital Management Systems (HIS), including further important information like unique IDs, Patient data and more. The dictation than gets send to SpeechExec Enterprise. Using the workflow of SpeechExec, a transcriptionist receives the dictation and transcribes it or uses speech to text. After the dictation was processed it is sent back to the Hospital Management Systems (HIS). This integration greatly benefits transcriptionists and reduces time-consuming manual processes: Transcriptionists no longer need to manually paste data into the Hospital Management Systems (HIS).
Document Management Systems (DMS)
Once the Document Management Systems (DMS) is connected to SpeechExec Enterprise, users will automatically receive transcriptions (documents) in the DMS by utilizing automatic upload functionalities. This enables the automatization of various processes: Texts are processed automatically, which reduces manual work. It also helps mitigating common errors when data is manually copy/pasted.
Integrators Mobile API
Users can upload their dictations from a mobile device or mobile application to SpeechExec Enterprise. In SpeechExec the dictation follows the classic dictation workflow, ensuring that the dictations are assigned to the correct transcriptionists or automatically send to speech to text.